Monday, May 30, 2016

Blue Shift

Did anyone read my last post and think, "Loose silhouette?  What is she talking about?"  Haha, baby steps!  Here's the next iteration. 
There's some extra pictures because I can't decide how I feel about this style.  Opinions?  Feedback so far has been "elegant".  That's nice... but wearing it I feel like I'm in a hospital gown. 
 This is a navy blue rayon challis.  I ironed it immediately before these pictures!  It wrinkled that much just from leaning over to put my shoes on.  Oh, well.  It's finished with store bought bias tape turned to the inside and top stitched. 
 
 Some of these pictures are more flattering than others.  The side view is perhaps not the prettiest part of this dress. 

Less flattering

I added a rouleau strap across the deep scoop back.
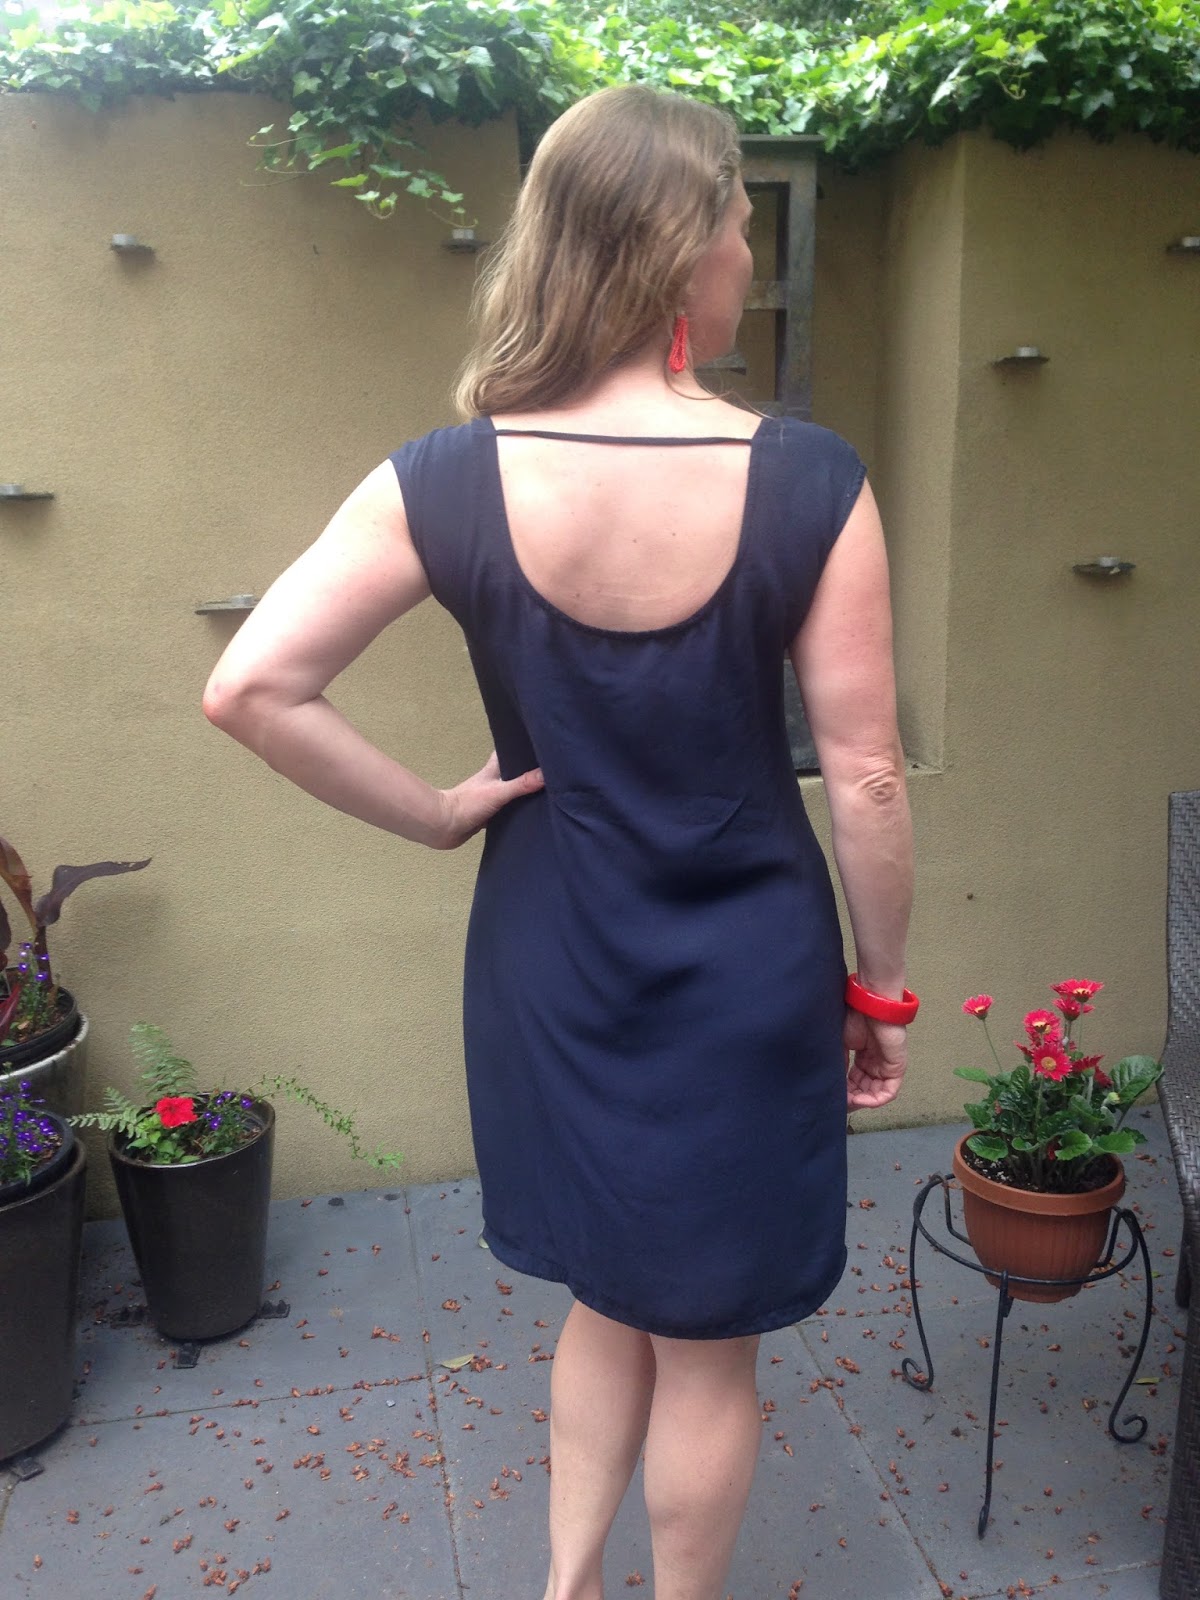
Ok, I'll put my hands down and let the dress just hang ...
 

Here it is with a belt.  I think my stylist could have stepped in here to arrange the poof better. ;)


If you noticed that the busted darts looked a bit high in some photos above, 
it's because the dress tends to slide back.  Wardrobe malfunction! 
I considered several solutions to keep it in place and not show my bra.   I think the simplest is the most effective -- little safety pins through my bra straps at the shoulders.

Tuesday, May 17, 2016

Shifting

In the past year or two I've been seeing the trendy silhouette shift to a looser shape.  Many sewing bloggers have made beautiful, loose dresses that look lovely on them, 1, 2, 3, 4 to point out a few.  In particular, the Flutter dress from Papercut captured my imagination.  Here are some inspiring examples:  1, 2, 3

This is not that pattern.  I'm not sure this trend is for me, much as I'd like it to be.  A shapeless sack drapes elegantly on a slender figure, or, specifically, a figure that is slender on top.  Can it work for us well endowed ladies?  Only one way to find out...


 I decided to ease in slowly.  I lengthened my basic sloper, played with the neck and shoulder line, and... left out the waist darts front and back.  Whoa!  This is my wearable muslin made in a rayon challis from eBay.  I finished the neck and armholes with store-bought black bias tape. 
It came out to be very wearable.  It needs a belt only because I was sloppy about putting in the side-seam pockets and skipped the stay tape, so the pockets pouch strangely around the hip.  I can shimmy in and out without a closure, so it's a quick sew.  Verdict on the sack?  To be investigated further...

Wednesday, March 2, 2016

Little Black Myrtle Hack


I made another Myrtle dress, this time in a plain, black, rayon jersey from JoAnn's.  I have to admit, though I love prints and color, that this dress is easy to wear a lot.  I wanted to try slimming down the bodice and an idea I had for the back.  I re-traced the pattern in the smallest size and compared it to my "sexy fit" T block, example here.  I left it with a bit more room than the T for some blousey effect.  I wish I'd added length to the skirt, though I did cut the skirt at the length for the largest size. 
This shot is the build-up...  I'm turning...  Wait for it...


Here's the back.  Ok, I know it's hard to see in the black from a distance.   I fixed something that I didn't like in the original and added a cut-out, which I love. 
I didn't like how the back neck and armholes are just turned and hemmed.  I found that difficult to do nicely.  My solution was to use two back pieces that overlap from the armholes up.  Then below the arm holes each piece is cut on a diagonal to the waist.  All the edges are then enclosed nicely except for the two straight edges of the diagonal, which are easy to hem or finish with a band.  It leaves a little peep of low back and adds some ventilation for hot summer days.  I love this simple hack and plan to make several more Myrtles like this. 

 Here are my accessories.  These pictures are from HI, after all.  Tropical!
 
And... I'm a Tiger.  This one's for you, Kurt. 

Thursday, February 11, 2016

Rite of Spring Shorts

Aloha!  Ok... I started this post on vacation.  I've been home for quite some time now, but let's just roll with these pictures from tropical paradise. 

I tried the Rite of Spring Shorts again.  Somehow I had thought this pattern was already fitted and ready to just sew up.  Then, as I tried on the shorts in progress, I suddenly recalled that I had done lots of on-the-fly alterations to make the first pair fit at all.  This pair turned out huge.  Upon checking my pattern pieces and reviewing the size chart, I determined that I had cut a size too big to start with.
If you look closely at that back view you can see where I took in the back with two long seams.  I removed about 8 inches before I attached the waistband.  You can see that the fit through the crotch back and front is still problematic.  My biggest issue is that when I walk the shorts shift back so I have a baggy butt and camel toe effect up front.  No!!!  I will try detaching a bit of the waistband in front so I can shorten the front crotch length.  I really like the idea of these shorts and will continue to work with this pattern. 

I made the top for my show. I'm pretty sure that link won't work.  I'll try to update it at some point with a better link.  The bow is designed to cover your bra strap.  You can buckle your bra right through the "knot" to keep it in place.  Here's some pictures of my lovely friend Kelly modeling this top with different shorts on the runway.
Here's some flat shots of the shorts.  Oh, yes, I added a little wedge of contrast fabric to accentuate those flattering design lines in the front.  I love how that turned out with the turquoise piping. 
And here's the beach, just for fun.  Mahalo!

Monday, December 14, 2015

Felicity Separates

Here is the first Felicity I made.  I already blogged my second version here.  I love this outfit and wore it a lot all summer. 
 I used a red polka dot grey chambray from Gertie's line for Joann's.  I like it, but it does love to wrinkle.  I finished the edges and trimmed the skirt waistband with purchased red bias tape.  I don't recall which size I made, but I followed the sizing chart. 

  
The twirly circle skirt is really fun and surprisingly perfect for biking. 


 Surprise!  It's separates.  I made the bodice first as a wearable muslin after my first true muslin and an FBA.  Then it came out so well,  I decided to make up the matching skirt. 


I love that they are separates.  I like the skirt with a black or navy T-shirt.  The top is cute with the shorts from my last post.  The red and grey reversible bag from that pot is perfect with it, too. 
Here's a flat shot to show the polka dots. 
I love this pattern, and I expect to make it man more times.  Thanks for reading!

Saturday, December 12, 2015

Chataigne Shorts


 Hello, blog!  Before I got completely consumed by school this summer, I did quite a bit of summer sewing.  I'm on a short vacation on Kauai right now, camera in hand, so I figure it's a great opportunity to blog some of these old projects.  
First up, I have my first pair of Chataigne Shorts from Deer and Doe and another Maria of Denmark Kimono Tee, modified like my last one.  Here's some photos, front, side, and back: 

  
I used a red, bottom-weight cotton for the shorts and an anchor print jersey for the shirt, both from Joann's.  I made the shorts so long ago, the details are fuzzy.  I don't recall which size I made, but I do believe I had to bring in the back waistband.  I also added patch pockets under the flaps in the back.  In future iterations I extended the inseam a bit right at the crotch, front and back.  This pair is perfect once they stretch out with some wear, but they are a bit tight up in there right out of the wash. 

I also made a matching beach bag out of the same red cotton and some grey from my stash.  It's a free pattern from Very Purple Person.  I really like this bag, and I've made it several times now. 
 Yep, reversible -- here's the grey color.
 Here's some flat shots of the shorts.  I apologize that they are completely un-ironed.  Vacation.  Also, I meant to crop my feet out of these photos, oh well.  The contrast lining for the yoke and pockets is from an old shirt that could not be salvaged as a shirt but had nice embroidered fabric.  Maybe you can't tell, but I got the point on the yoke nice and even, thanks to Leah.  I picked this pattern specifically to practice the V yoke for one of the looks in my collection.  On the shirt I cut the neck a little deeper and gathered it with some pretty buttons. 


 And here it all is out in the wild.  Aloha!

Tuesday, May 26, 2015

Felicitous Photo Shoot


 I made a Felicity Dress by Jennifer Lauren Vintage.  It's actually the second version I've made of this pattern.  I just happened to get some quick photos when I went to a Pacific Northwest Ballet studio rehearsal with my dad. 

I used a polyester peachskin from my stash.  I don't know how a synthetic snuck in there, but I love the print, and I didn't feel too precious about it if the dress didn't come out well.  Ahhh, stash...

 I've realized a clear pattern in my acquisition of crafting supplies.  Back when I first started to knit, I got very excited.  I loved to envision beautiful projects, and then I'd get started with the first step -- buying supplies.  Then I'd get nervous.  I'd feel that I didn't have the skills to accomplish my vision, that I'd be wasting the lovely materials and creating garbage.  So... I'd buy a different yarn to use.  And repeat.  I know, it's so silly!  It's especially silly with knitting because you can always frog and reuse the yarn.  Now I'm finally at a place in my knitting life where I can make anything I envision.  It feels great, and I'm working through the huge stash I've acquired.
I'm looking forward to achieving the same proficiency and confidence in my sewing.  See the fit on the Felicity bodice?  Yay!  I'm really happy with the FBA adjustment from Jennifer Lauren's blog.
This long-stashed poly was actually very easy to work with once I starched the heck out of it.  I rely on this trick frequently to give me confidence with slippery fabrics.  It's trimmed with store-bought bias tape. 
Terrible picture, but it's the only one that showed the whole dress.
I made a few changes to this version of Felicity.  I lowered the neckline after my first muslin by cutting it and transferring the new  line to my pattern pieces.  I cut the bodice on the bias to play with the stripes, and I used a gathered rectangle for the skirt.  You can't tell, but I included in-seam pockets.  I love cutout backs, so I made a simple modification to the back bodice.  I'm really happy with how my idea turned out!
I'm sorry these photos are so crappy, blurry, and unflattering...  I don't have a real camera.  It's a serious deterrent to my blogging efforts.  But I like the idea of blogging, so here you go.
  
I wore Felicity with my newly finished Acer cardi.  This is another item from materials I've had for a long time, both the yarn and the pattern.  I used the lovely Jo Sharp Silkroad DK Tweed, a blend of 85% wool/10% silk/5% cashmere.  I made my usual modifications to fit me and to knit it seamlessly.  This is the most cropped cardigan I've made, ending right at my waist.  I really like it, and it used hardly any yarn. 


Here's a final shot of my accessories and a picture of my crazy braid.  Thanks for visiting!